After launching a new website or app, it’s natural to be curious about its performance. If you’e interested in learning the steps to start collecting that user data, take a look.
1. Enter Admin
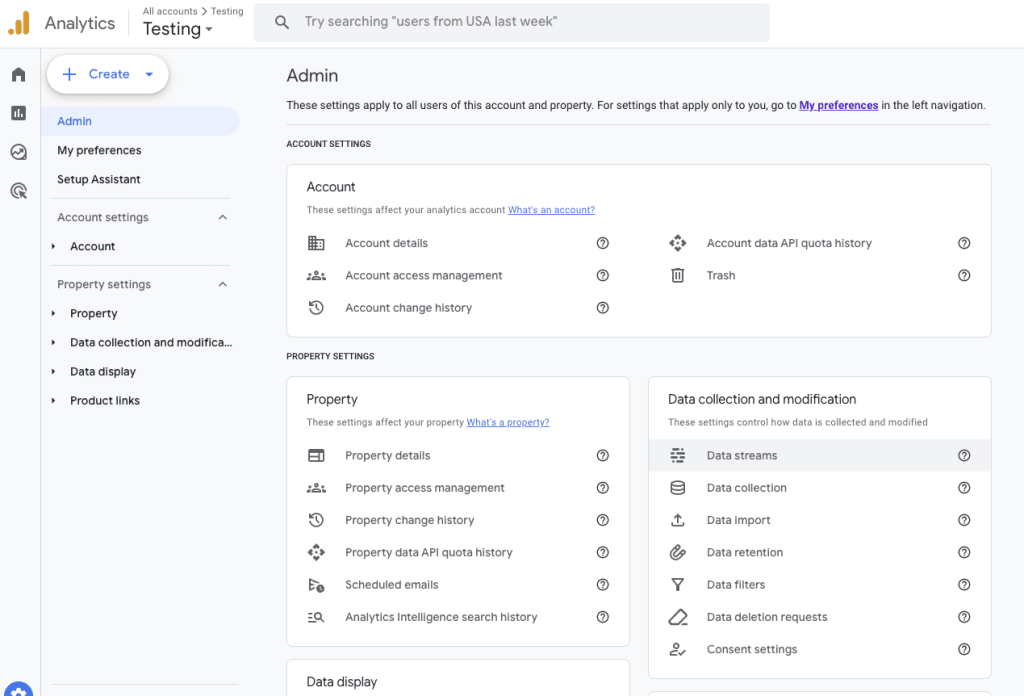
Sign in to your Google Analytics account and navigate to the property you’re interested in tracking. Then, click on the “data streams” item under “Data collection and modification”.
2. Choose Your Data Stream Type
Once you’re in the data stream screen, choose the type of data stream you’re looking to collect data from. For example, if you launched a website and need to start tracking user data, you would choose “Web”. If you launched an iOS app and would like to start tracking app user data, you would choose “iOS app”. If you have both a website and an iOS app, you would create a data stream for each, and they would both collect data that flows into your reports and dashboards at the same time across two streams. For this example, we’ll choose “Web”.

3. Enter Your Site Url and Site Name
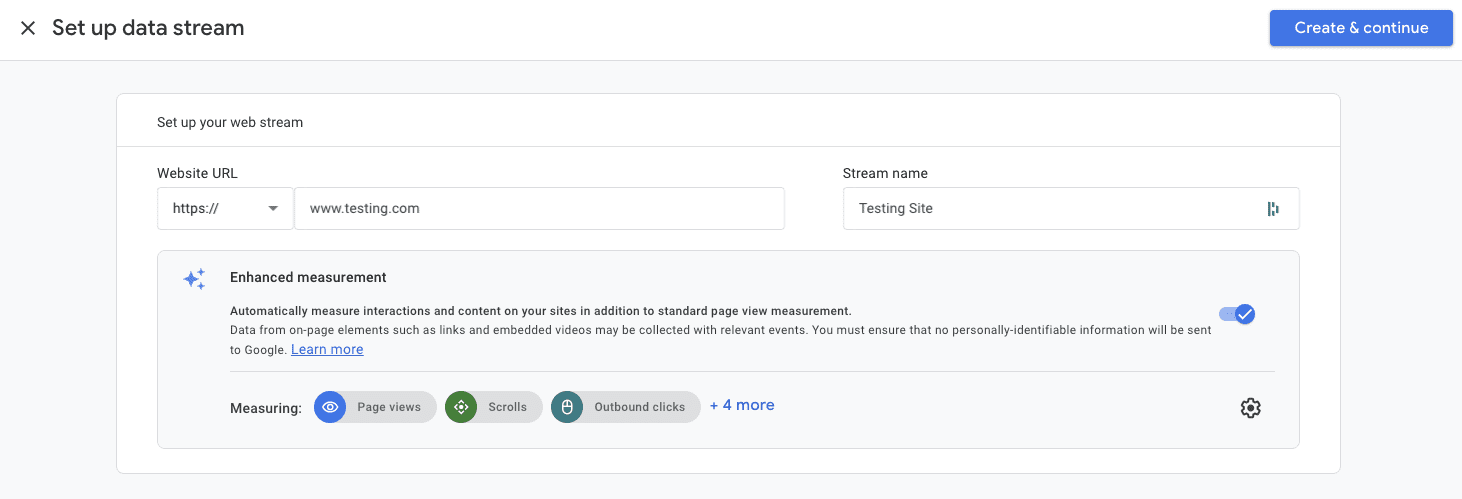
After selecting one of the options above, you’ll need to enter your website’s url followed by the name of your site. Take a look at the Enhanced measurement options and determine if the events Google automatically watches out for are something you’d like to collect, it’s certainly easier and faster than generating these events manually. There’s some debatability on how effective these are at their jobs, so if you’re looking for ultimate accuracy then configuring events manually in Google Tag Manager might be more your style.
Once you’re ready to move on, click on “Create & continue”.
4. Set Up a Google Tag on Your Site
Next you’ll need to set up a Google tag on your site. You can do this in multiple ways, depending on the type of site you have. For WordPress, you can simply choose the “WordPress” option and click next for this step.
For sites that are built using other Content Management Systems, like Drupal, Shopify, Magento, etc, the process will be a little different; but there are plugins and add-ons that make the process similar to the one we’ll show below. For custom sites, or for users who prefer a cleaner site build, Google Tag Manager is a powerful tool to implement manual tagging, which we’ll cover in later tutorials.
For now, we’ll choose “WordPress”.

5. Install the Site Kit Plugin
After clicking the WordPress option above, the screen will show a nifty set of instructions on installing Google’s Site Kit plugin that you can follow. Before you head off to the races here, definitely collect that tag ID in step one, you’ll need it for later.
Site Kit is a convenient tool for not only integrating this Google Tag to your site, but also for displaying your Google Analytics data directly on your site’s dashboard. Using Site Kit, you can circumvent needing to go to Google Analytics separately and get insights right from there. For now, let’s go back to installing this Google Tag.
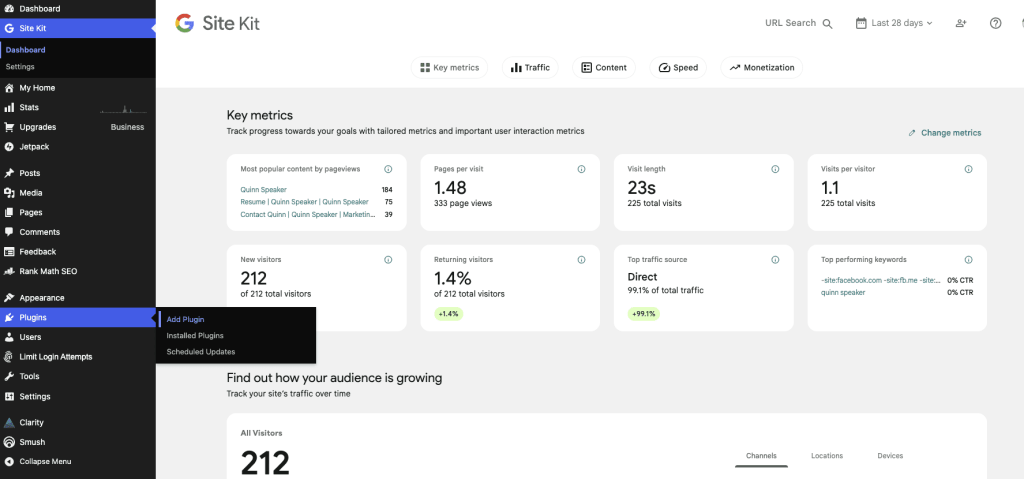
Go to your site and click “Add plugin”, find Site Kit in the plugins list, and click “Install now”. After Site Kit is installed, navigate to your installed plugins on the left, then find it in the list and click “activate” and check the “Connect Google Analytics as part of your setup” box.
6. Configure Site Kit
Once Site Kit is activated, you’ll need to configure it to be able to connect with your Google Analytics property. This is a lot easier than it sounds – all you’ll need to do is log into your Google account and grant Site Kit permission to verify that you in fact own the site, which is an automated check.
Next, grant Site Kit permission to connect with the Google Analytics account you’ve created, and click “Set up Google Analytics”. Choose your Google Analytics property from the dropdown, and click “Configure Analytics”.

7. Test Your Google Tag
If you’ve set up everything correctly, then on your site in the Site Kit dashboard Analytics will appear as “Connected”. If not, then you can head back over to Google Analytics and in the installation instructions it will say “Scan” at the very bottom.
Give your site a scan, and if it says “Your Google tag wasn’t detected on your website” then you’ll need to troubleshoot. But don’t worry! Sometimes it just takes time to connect properly. We’ll cover troubleshooting Google Tag installation in later tutorials, just in case.


