There’s nothing worse than celebrating accidentally tainted data. So while setting up Microsoft Clarity, remember to block your IP and/or your Clarity ID. Here’s how:
Total Time: 2 minutes
1. Get to Dashboard and Enter Settings

Navigate to your Microsoft Clarity dashboard, either directly from your site or from the Clarity site, and click on the gear icon marked “Settings” in the upper navigation panel.
2. Identify Your IP

You can find your IP in numerous places, like under your Wi-Fi settings on your PC or sites like Nord VPN or What is My IP Address. Grab your IP and head back into Microsoft Clarity.
3. Add Your IP to the Block List
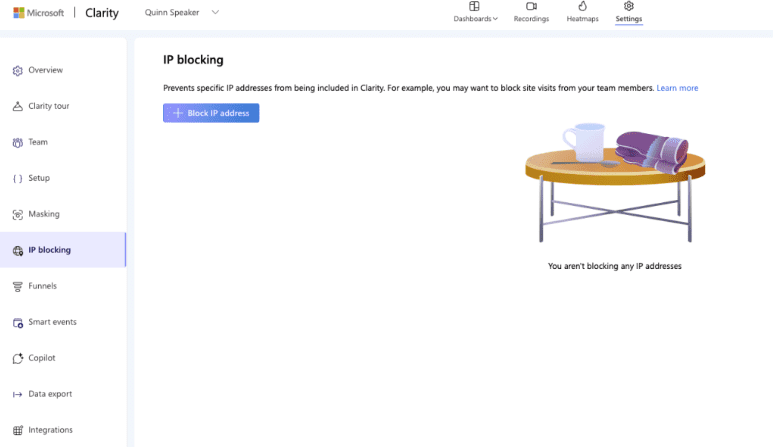
Once you have your IP address, navigate to the “IP blocking” section of the lefthand navigation window. Click “Block IP address”, and a popup window will display where you can enter a name for the IP, along with the IP address itself. If you have location data on, an option labeled “Block my current IP” will appear which is incredibly useful.
You can go ahead and check the box, or enter the IP address you grabbed off page, into the textbox. Click the “Add” button, and Clarity will take care of the rest.
4. Locate Your Clarity ID
If you’re looking to only block yourself and your own user data from appearing in your Microsoft Clarity dashboard, or other users you know aren’t likely true users out in the wild, then there’s another option for you. It’s a little cleaner to leave the rest of your IP address open for true users who happen to live or work in the same IP rather than exclude their data, after all.
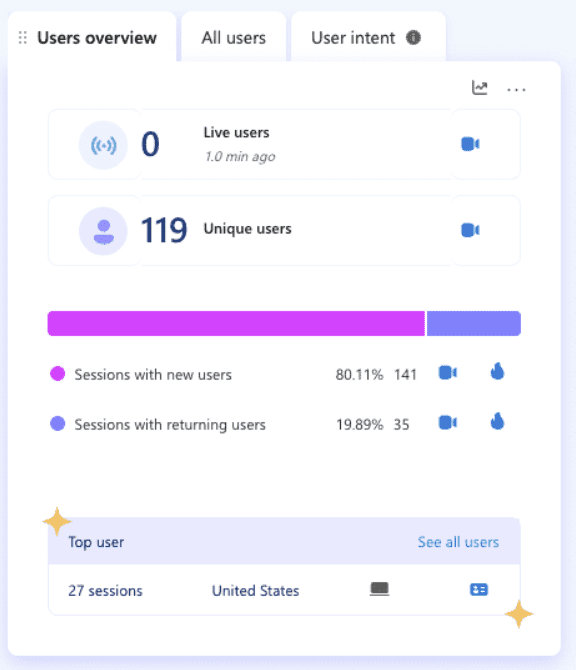
First, find yourself in the data collected. If you’re anything like me, you check on your site progress often to make improvements. If you are on the site often, then you’ll see yourself listed in the top sessions of the user overview.
If you have a ton of site traffic or check in less frequently, then you may not appear in top users. So, make sure to do something unique on-site that would be easily filterable or identifiable – like submitting a contact form at exactly 1:11 – and check the user data collected for that time. You should be able to find yourself either in recordings or under a filter, with a dead giveaway being that the admin window will be open up top if you were logged in during your activity.
Once you locate your recording or profile, click on the user profile card on the right to view visitor info. Under visitor info will be your Clarity ID code.
5. Apply Filter

Take your Clarity ID and click on the “Filters” button in the upper left to open up the filers window. Scroll down the left menu until you reach “Custom filters” and click to enter the submenu. Next, click the option labeled “Custom user ID”.
In the box highlighting “Custom user ID”, enter the Clarity ID that you copied from earlier. Make sure you check the “Exclude selection” box, otherwise you’ll just add a filter that will only show your own site behavior data.
After clicking “Apply”, your dashboard will now completely exclude any site activity that you may have added to your site while testing or during updates.
6. Final Thoughts
Remember, the Clarity ID filter method will exclude any users you choose, but will only be temporary unless you save it as a segment. IP blocking is a longer term way to ensure your activity isn’t convoluting your site data, but can exclude legitimate users as well. Choose wisely for each report you’re pulling, and happy data diving!

